Your first setup
The guided trail you meet the first time you sign in — pick your road, then set your stable up in about eight minutes.
ForAdmins
On this page
The very first time you sign in with no stable of your own and no invitation waiting, Nose doesn't drop you onto an empty screen. It opens a short, full-screen setup trail that gets your stable live in about eight minutes — and then never shows up again.
Which road are you on?
The first screen asks how you'll use Nose. Pick one — you can do both later from the same login, so nothing here is final.
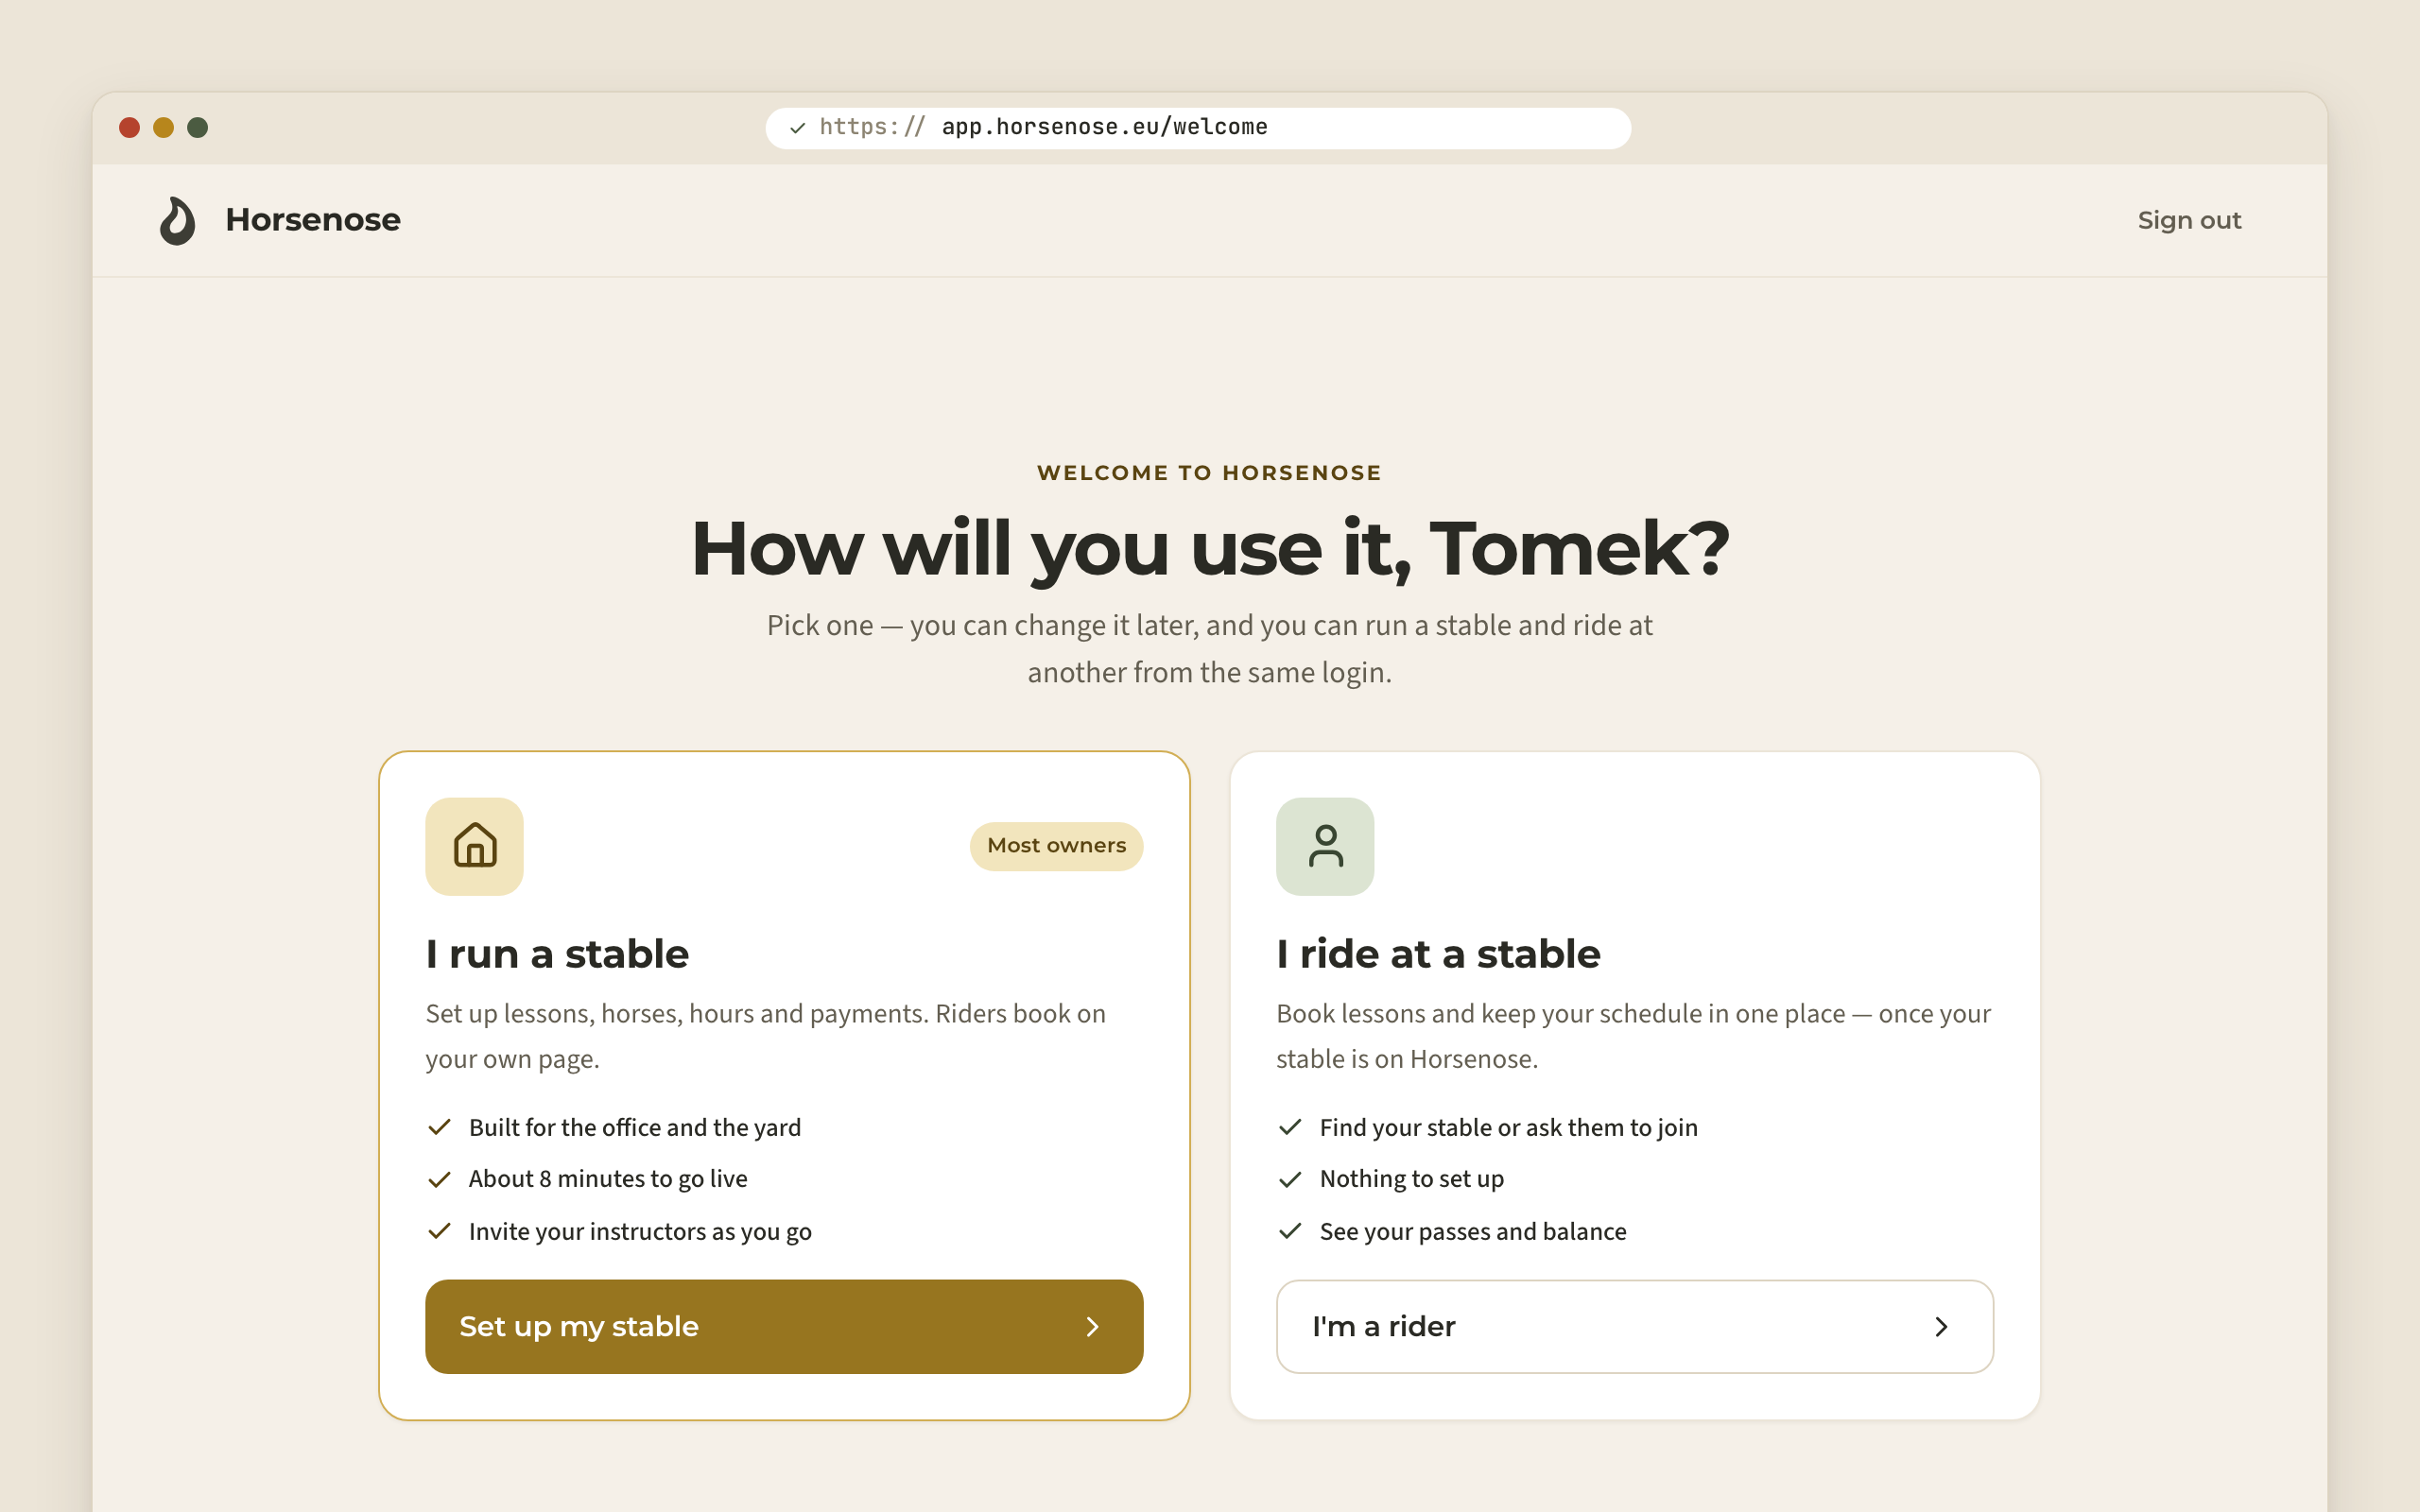
- I run a stable starts the setup trail below — lessons, horses, hours and prices.
- I ride at a stable is for riders whose stable isn't on Nose yet. It gives you a ready-to-send message to nudge your stable to join, and a note that once you're invited, their link signs you straight in. There's nothing for a rider to set up, so this road just points you to your account for now.
The rest of this page follows the owner road.
Sample or blank?
Before the steps begin, you choose how the forms start out:
- Start from a sample pre-fills each step with typical riding-school rides, prices and hours — you just adjust them to match your yard.
- Start blank gives you empty forms to fill from scratch.
Either way, nothing is created until you continue a step — the sample only fills the forms in for you. You can switch a step back to blank at any time.
The six steps
A trail down the left shows where you are and what's next. Every step also tells you where that setting lives permanently, so nothing you do here is trapped in the setup — you can always come back to it later from the normal menus.
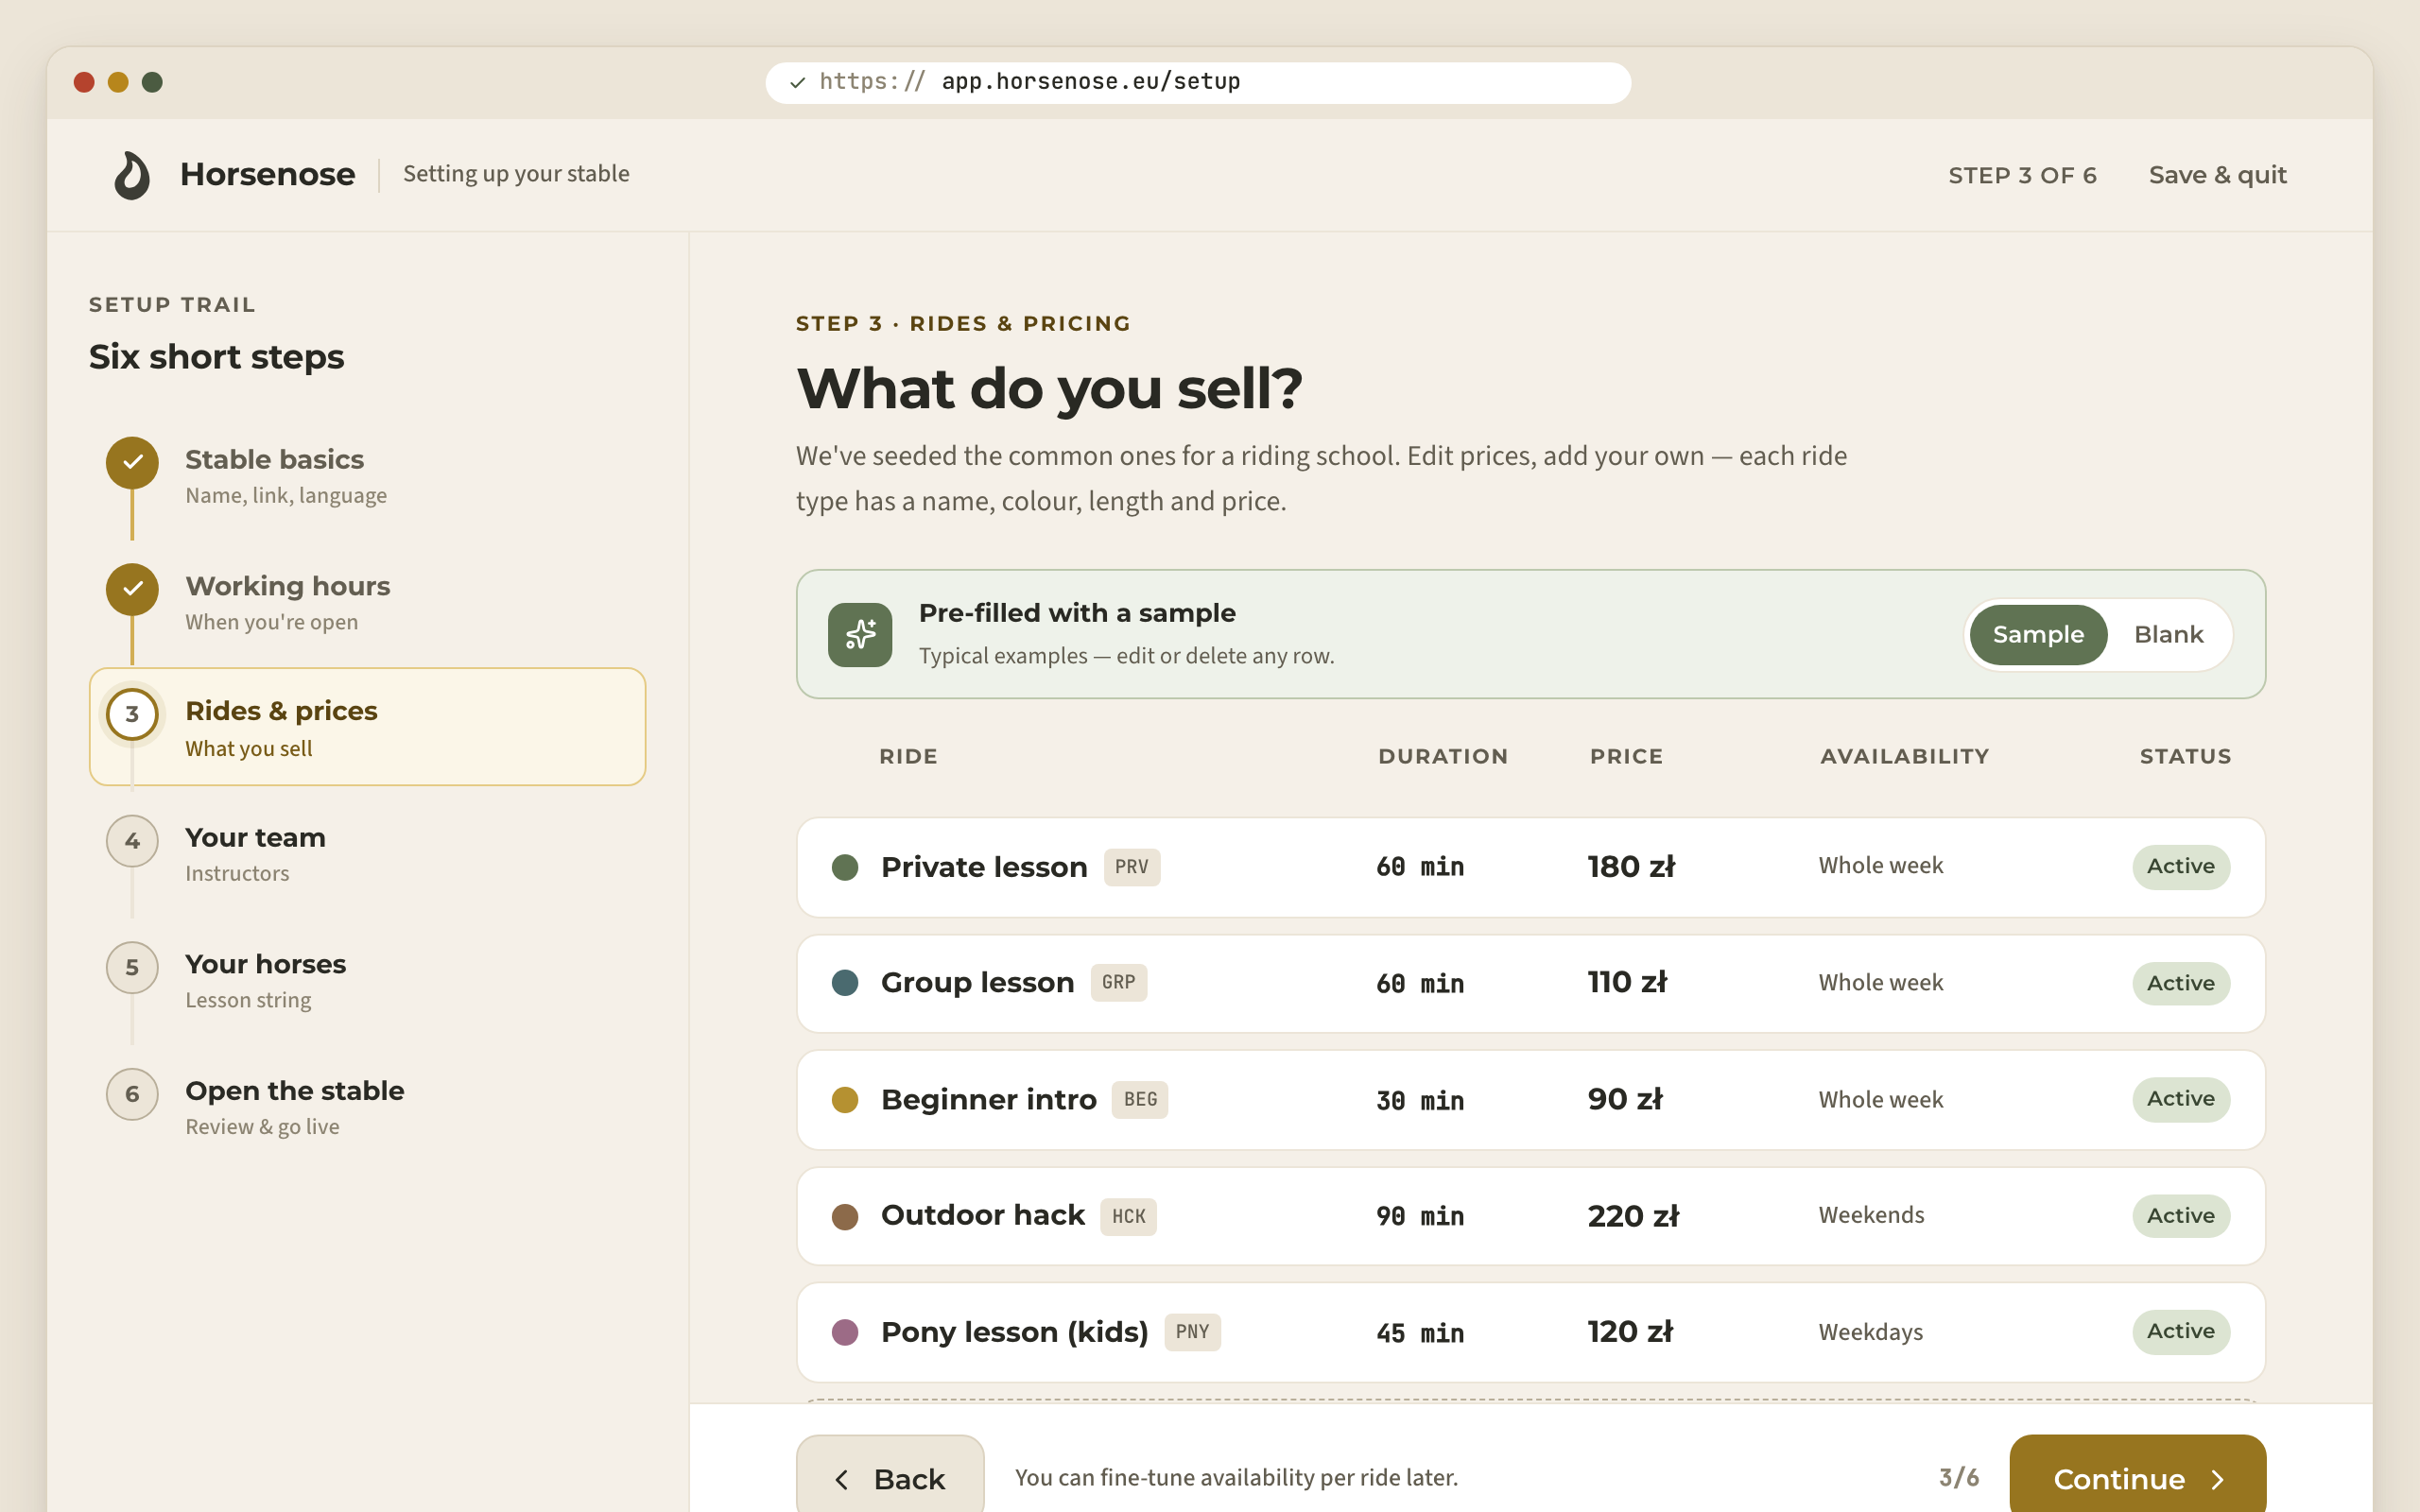
- Stable basics — your stable's name, its booking link, default language, currency and timezone. This is the step that actually creates your stable — the moment your setup is saved. (These same fields are covered in detail in Create a stable.)
- Working hours — set the days and times you're open. Holidays and one-off closures come later, in the schedule.
- Rides & prices — your ride types, each with a name, colour, length and price. Edit the sample rows or add your own.
- Your team — invite your instructors by email. Each gets their own login and sees their own rides and payouts. Teaching solo for now? Just continue — you can invite anyone the day they start.
- Your horses — add the horses you give lessons on. Nose tracks each horse's workload so nobody gets overbooked. Boarded-only horses can be added later.
- Open the stable — a live snapshot of everything you just set up (open days, ride types, team, horses, your booking link), with buttons to open your stable, copy your booking link to share, or jump straight into the schedule.
Leaving early — nothing gets lost
You can step away whenever you like:
- Before your stable is created (the Basics step), the button reads Skip setup and takes you to your account. If you come back later, the trail re-offers itself and greets you with a "welcome back".
- After your stable is created, the button reads Save & quit and takes you to your new stable's dashboard. Working hours, rides, team and horses are all optional bonus setup — skip any of them and finish later from the normal menus. Once your stable exists, the trail never traps you again.
Good to know
- The trail only appears once — for a brand-new account with no stable and no invitation. After that, signing in takes you straight to your stable (or to Your stables if you have more than one).
- A pending invitation always wins. If someone has invited you to their stable, you're sent to accept it instead of seeing this trail.
- Everything you save here is real and yours from the first step — it's the same data you'd enter in Settings, just gathered in one guided pass.
Related
- Create a stable — creating a stable with the guided setup, and how to add more stables later.
- The dashboard — where you land once your stable is open.
- Visiting a stable — the rider side: how riders find and join your stable.