Create a stable
Set up your own stable in a few minutes — the stables picker, the short guided setup that creates it, and where the first-run onboarding fits in.
PerAmministratori
Nose is organised around stables — every schedule, horse, customer, and euro (or złoty) lives inside one. This page covers where you create a stable, the short guided setup that builds it, and how you move between stables once you run more than one.
Your stables
If you belong to more than one stable, Nose can show you your stables — a simple list of every stable you're a member of, with your role next to each one.
- Click any stable in the list to open it.
- If you have a pending invitation waiting in your inbox, it's called out at the top of the page — accept it from the email itself.
- At the bottom of the page, Run your own stable? Create one starts a brand-new stable.
If you only belong to a single stable, Nose skips this list entirely and takes you straight there. And once you're a member of several, Nose remembers the stable you were last in and returns you to it on your next visit — so you're not re-picking every time. To bring this list back and open a different stable, add `?switch` to the end of the dashboard's web address, or open a different stable from the memberships list in your account.
Creating a stable
Creating a stable is a short, guided setup — the setup trail. It walks you through everything a working stable needs, one step at a time, and creates the stable for you along the way.
- Open the setup trail:
- from the stables list above, click Run your own stable? Create one, or
- from your account, use Create another — that option is always there, so you can add a second or third stable whenever you like.
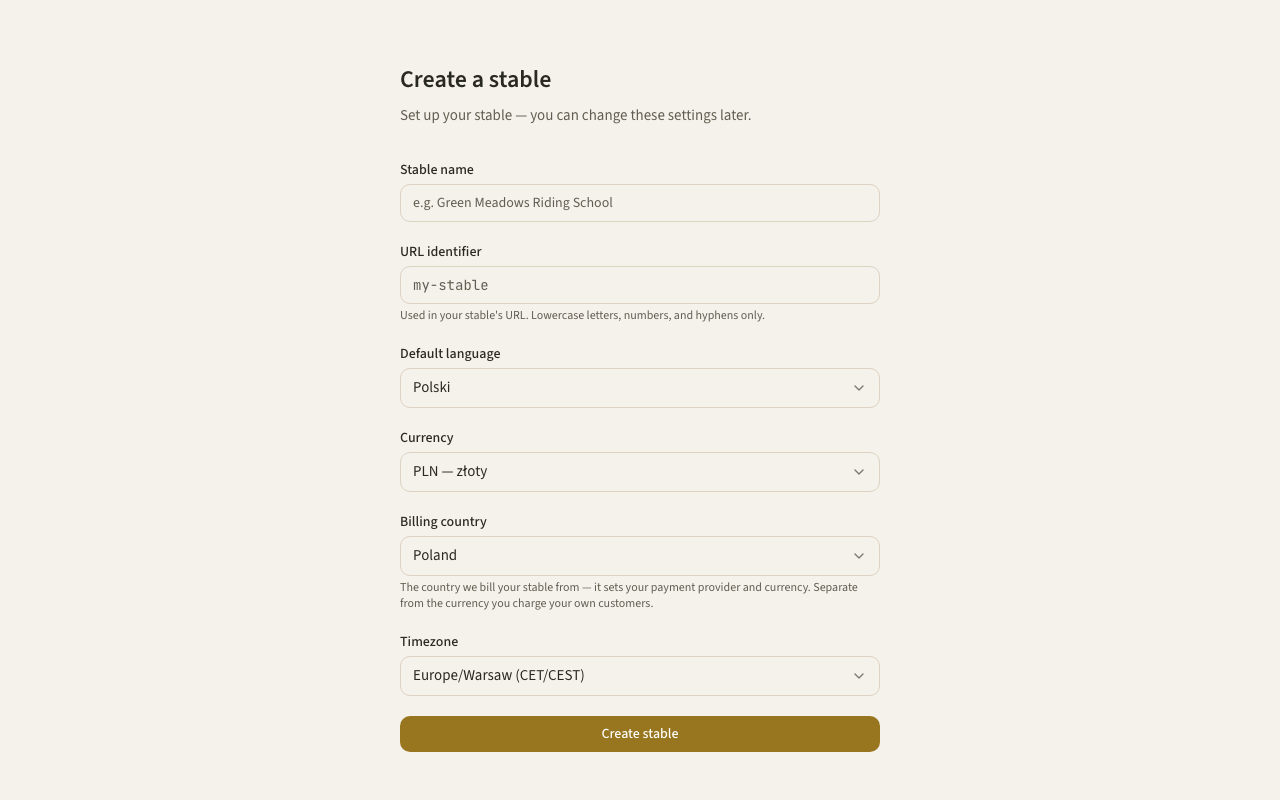
- Choose how to begin:
- Start from a sample pre-fills the later steps with typical riding-school rides, prices and hours — you just adjust them.
- Start blank gives you empty forms to fill in yourself.
Either way, nothing is created until you continue a step — the sample only fills the forms in for you.
- Work through the six steps:
- Stable basics — your stable's name, its booking-link address (the short, URL-safe identifier used in your web address), the default language, the currency you charge your customers in, and your timezone. This is the step that actually creates your stable.
- Working hours — the days and times you're open.
- Rides & prices — the types of ride you offer and what each one costs.
- Your team — invite your instructors and helpers (optional — you can do this later).
- Your horses — add the horses in your yard.
- Open the stable — a short summary, then straight into your brand-new stable.
You can leave the setup any time after Stable basics — everything you've saved is kept, and you can finish the rest later from Settings and the app itself. The booking-link address is the one thing that's permanent; every other setting can be changed later.
The full step-by-step walkthrough lives on [Your first setup](/docs/getting-started/first-run-setup) — it's the very same setup trail, covered one step at a time.
The first time you sign in
If you're a brand-new user with no stable and no pending invitation, you meet this same setup on your very first sign-in — with one extra question at the start that asks whether you run a stable or just ride at one. Choose owner and you're on the setup described above; choose rider and Nose sets you up as a customer instead, with no stable to create.
Good to know
- The setup trail is always available, even after your first stable — that's how you run more than one yard from a single login.
- A pending invitation always takes priority — if someone has invited you to their stable, you're sent to accept it instead of creating a new one.
- The booking-link address uses only lowercase letters, numbers, and hyphens, must be unique across all of Nose, and can't be one of a few reserved words. If the one you pick is taken or reserved, you'll get a clear message so you can choose another.
- Starting from a sample only pre-fills the forms — nothing is saved until you continue a step, and everything you save is yours and exportable any time.
- There's a limit on how many stables you can create in a short period, to stop abuse — if you hit it, wait a bit and try again.
Related
- Your first setup — the guided setup that walks a brand-new owner through creating a stable and its first data, step by step.
- Welcome to Nose — what Nose is and how these docs are organised.
- The dashboard — what you see once you're inside your stable.
- Settings — General — where to change your stable's name, language, currency, and timezone later.